Instrument flying basics.
Knowing the basics of instrument flying will give you an idea of what you need to learn to become an instrument-rated pilot.
This article is for private pilots to know the activities in instrument flight training. I discussed the only crucial materials and fundamentals of IFR flying to ease your instrument flight training.
I explained why instrument training is not as challenging as many pilots fear and how it can grow you as a better pilot.
Instrument training is merely improving your already existing flying skills from your private pilot training.
There are three primary things that you must focus on improving to acquire instrument rating:
- Solely relying on necessary flight instruments to conduct flights without visual references.
- Use of navigational aids to maintain track, courses, and bearings;
- Using approach plates to land at the destination airport without visibility and in adverse weather.
These three elements are crucial to becoming a safer and better instrument pilot. Soon you will recognize the three aspects of instrument flying are a vast subject.
IFR trainees’ common struggle is reading approach plates, but you can quickly master them with patience and practice.
First Basis of Instrument flying: Solely use aircraft instruments to conduct flights without visual references.
As a private pilot, you learned to fly VFR.
VFR flights are composite flights as you simultaneously use ground references and the instruments to aviate and navigate.
On the contrary, to conduct IFR flights, you will solely depend on the instruments.
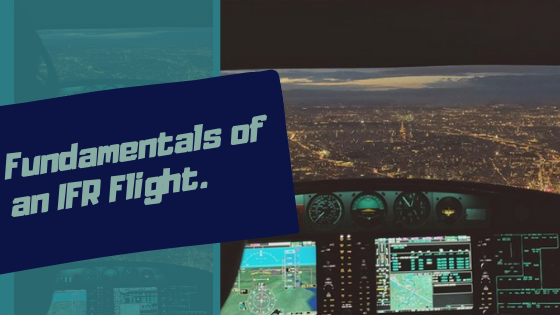
Know your aircraft instruments for better scanning. <3>
There are three classifications of instruments. It is necessary to discuss the types because these classifications will aid you in operating IFR flights.
Three classes of aircraft instruments are:
- Control instruments – Attitude Indicator, Tachometer, etc.
- Performance instruments – Airspeed indicator, Altimeter, Vertical Speed Indicator, Turn Coordinator.
- Navigation instruments – HSI, ADF, GPS.
Depending on your maneuver, the control instruments and performance instruments will become primary and secondary instruments to scan. Navigation instruments will direct you to your destination.
Proper scanning during instrument flight is critical, and a continuous glance of instruments can become confusing for a pilot without appropriate scanning methods.
To use the instruments properly, you have to practice the instrument scan technique.
The straightforward scanning technique keeps the attitude indicator at the center of your attention and then frequently look to the corresponding instrument that supports your current maneuver.
Attitude indicator requires the center of your attention as it reflects the aircraft’s pitch and bank angle.
The three standard instrument scan errors of trainee pilots, even for expert instrument pilots, are as follows:
- Omission – Not scanning an instrument;
- Fixation – Staring at an instrument for too long;
- Emphasis – Relying too much on a single instrument.
How to use the combined instruments for IFR flying?
You will learn the same basic maneuvers as you learned during your private pilot training, but now solely using the airplane instruments.
The four basic maneuvers of instrument flights are:
- Steady airspeed climbs and descents;
- Straight and level flight;
- Level turns;
- Constant rate climb and descents.
You will combine control instruments and power instruments to fly the airplane without looking outside the aircraft.
It sounds dangerous, but the reality is instrument flights are often safer than VFR flights, and all airlines operate flights using instruments.
RELATED: IFR vs. VFR.
To maneuver an airplane during IMC conditions, you must remember an acronym that will help you operate the aircraft. While training for IFR, remembering these steps will help you think ahead of the aircraft.
It is essential to think and act ahead of the aircraft in instrument flights, so remember these acronym ETSA:
- E – Establish pitch and power for each maneuver;
- T – Trim airplane to release pressure from the controls;
- S – Scan performance instruments;
- A – Adjust control instruments as required.
There are rules for maneuvering the aircraft in IMC conditions with the scanning technique.
Steady climbs and descents.
While climbing or descending, you must follow the ETSA acronym to establish your maneuver.
To keep your aircraft steady, you have to observe the instruments. At this stage, your primary pitch indicator is the Airspeed indicator, and the secondary tool for pitch indications is the Attitude indicator.
To track bank angle during steady climbs or descends, observe the Heading indicator, and your supporting instrument is the Turn coordinator.
Straight and level instrument flight basics.
During a straight and level flight, your primary pitch indication instrument is Altimeter, and the supporting pitch instrument is the vertical speed indicator (VSI).
At this stage, your primary bank indicator is the Heading indicator, and the supporting bank indicator is the turn coordinator.
Level Turns in an instrument flight.
For level turns in an instrument flight follow the acronym ETSA.
E – Establish a maximum 30 degrees bank angle. More than that is unnecessary for instrument flights;
T – Trim as required to release pressure from the controls;
S – Scan performance instruments;
A – Adjust control instruments.
For level turns, observe Altimeter for primary indications of pitch angle and VSI as the secondary pitch angle.
Check the Turn coordinator as the primary instrument and the attitude indicator for the supporting instrument to keep an eye on the bank angle.
To roll out from a level turn, you must again follow the acronym ETSA.
There is a simple technique for a smooth transition from a bank to your desired heading.
- Suppose you are turning at a bank angle of 20 degrees. Your desired magnitude is 260 degrees.
- So begin rolling out at a heading of either 250 degrees or 270 degrees.
That way, you will have a smooth instrument flight without too many corrections to make.
The math for this is simple:
- Divide your bank angel by 2, such as in this case 20/2 = 10;
- Now add or subtract 10 degrees from your desired heading to determine which magnitude you must begin transition.
Climbing and descending turns for IFR flights.
Follow the ETSA acronym for climbing and descending turns, and then focus on instruments to track your maneuver in this order.
For pitch, the primary instrument is the Airspeed indicator or the Vertical speed indicator. The secondary tool for observing pitch is the Attitude indicator.
The primary instrument is the Turn coordinator, and the supporting mechanism is the Attitude indicator to observe bank angle.
Constant rate climbs and descends.
For constant rate climbs and descents, observe the VSI for primary pitch indications and the attitude indicator for supporting pitch indications.
For bank angle indications, use the Heading indicator or the directional gyro as your primary tool and the attitude indicator as your supporting tool.
Learn to use navigational aids for instrument flying.
Did you learn to use navigational aids during your private pilot training? If you did, it’s going to be useful now.
For instrument training, you will navigate using navigation instruments.
Not knowing how to use the navigational aids is not an option for IFR flights.
VOR is the typical instrument private pilots learn to use. But as an instrument pilot, you have to master the use of HSI and GPS. Similarly, you will learn the use of an instrument landing system (ILS). ILS consists of the localizer and glideslope that helps safe landing of an aircraft.
You will use the navigation instruments to track courses and bearings en-route to your destination.
Unlike VFR flights, you have no landmark to follow in an instrument flight. Your only aid is the navigational aids and instruments present in your airplane.
Don’t want to land at the wrong airport? Then master using navigational aids.
Master approach plate uses for excellent landing.
Understanding the approach plates and charts is the most critical aspect of instrument flying.
An approach plate gives heads up to the pilots on arrival and approach procedure to the destination airport.
Misreading the approach plates can have fatal consequences.
An approach place has everything a pilot needs to learn about the destination airport for a safe touchdown.
Plan view and profile view of an airport’s:
- Arrival procedure;
- Fixes;
- Minimum and maximum altitude between fixes;
- Localizer distance;
- Glideslope angle and distance;
- Runway course, Runway elevation, Runway length;
- Essential Airport frequencies;
- When to break the glide is given in the approach plate;
- Likewise, details about missed approach procedures.
If you know to read an approach plate, you can automatically land the airplane in IMC. Follow the instructions and land the aircraft smoothly in adverse weather conditions.
Nevertheless, for instrument rating trainees, the arrival and departure procedures are most challenging.
IFR approach to an airport is genuinely critical in adverse weather.
Understanding approach plates is crucial, and knowing how to use approach plates will make your IFR flight a breeze.
There is a course by Rod Machado that only focuses on the arrival and departure procedures of IFR.
Take that course, as it only emphasizes the necessary materials for instrument approach and departure.
